

Das letzte Update war vor 14. August 2023 von Vinzenz Schächner
In diesem Artikel: Crowdsec installieren – NextGeneration Homelab & Cyber Security • Schächner (xn--schchner-2za.de) haben wir euch gezeigt, wie Ihr CrowdSec installieren könnt.
Dann haben wir noch eine grafische Oberfläche hinzugefügt: CrowdSec Dashboard installieren – 2 Wege • Schächner (xn--schchner-2za.de)
Nun zeigen wir euch, wie Ihr CrowdSec für andere Dienste wie Cloudflare, WordPress oder NextCloud einrichtet.
1. CrowdSec mit Cloudflare
Wir installieren die Clouflare Erweiterung mit
sudo apt install crowdsec-cloudflare-bouncerDann fügen wir unter Cloudflare (API-Token | Cloudflare) einen API-Token mit folgenden Berechtigungen hinzu:

Jetzt bearbeiten wir folgende Datei:
sudo nano /etc/crowdsec/bouncers/crowdsec-cloudflare-bouncer.yamlDort fügen wir mehrere Sachen ein.
Für den Bereich „zone_id„gehen wir zu unserer Domain in Cloudflare und suchen rechts unten die „Zonen-ID„. Diese fügen wir ein.
Es gibt auch eine Möglichkeit, mehrere Zonen hinzuzufügen. Meldet euch gerne, wenn ihr diesbezüglich mehr hören wollt!
CLOUDFLARE_ACCOUNT_ID ersetzen wir durch unsere Konto-ID, die wir auch unten rechts finden.
Die Kombination für „token“ finden wir unter der Ausgabe des Installationsbefehles.
Den Abschnitt weiter unten mit „Promotheus“ setzen wir vorerst auf „false“.
Am Ende sollte diese so aussehen:

(In diesem Fall wurden 2 Zonen hinzugefügt)
Jetzt starten wir den Dienst mit
sudo systemctl enable crowdsec-cloudflare-bouncerund
sudo systemctl start crowdsec-cloudflare-bouncerZu Cloudflare hinzufügen können wir die Regel mit:
sudo crowdsec-cloudflare-bouncer -sEntfernen können wir diese mit folgendem Befehl:
sudo crowdsec-cloudflare-bouncer -dOb eine neue Regel aufgetaucht ist, überprüfen wir unter dash.cloudflare.de/security/waf/custom-rules
Wollt Ihr eine weiterführende Dokumentation, findet Ihr die unter
Cloudflare Türsteher | CrowdSec und
crowdsec.net/blog/installing-and-configuring-crowdsec-into-cloudflare
Eine interessante Lektüre ist folgender Blogeintrag:
crowdsec.net/blog/how-to-beat-application-ddos
2. CrowdSec mit WordPress
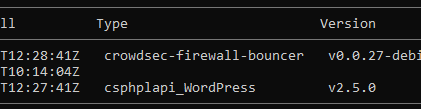
Im ersten Schritt müssen wir uns einen API-Key mit
sudo cscli bouncers add wordpress-bouncergenerieren. Dann wechseln wir in unsere WordPress Instanz und installieren dort das Plugin namens „Crowdsec“.
Das konfigurieren wir wie folgend:

3. CrowdSec mit NextCloud
Mit CrowdSec und NextCloud haben wir persönlich noch nicht ausprobiert, aber natürlich trotzdem etwas für euch gefunden.
Wir installieren eine Regel mit
sudo cscli collections install crowdsecurity/nextcloudDanach muss man noch Crowdsec neustarten:
sudo systemctl reload crowdsecFür mehr Informationen könnt Ihr euch auch hier an folgender Anleitung orientieren:
crowdsec.net/blog/install-and-secure-your-nextcloud-server-with-crowdsec
4. MySQL und MariaDB
Wir fahren hier immer nach dem gleichen Prinzip vor, deswegen aber jetzt einfach nur noch die Code-Zeile (ohne Erklärung). Sollte etwas unklar sein, gerne melden!
sudo cscli collections install crowdsecurity/mysqlsudo cscli collections install crowdsecurity/mariadb5. Uptime Kuma
sudo cscli collections install timokoessler/uptime-kuma6. Webmin
sudo cscli collections install andreasbrett/webmin7. WordPress
sudo cscli collections install crowdsecurity/wordpressAm Ende von all den Befehlen starten wir nochmal CrowdSec mit
sudo systemctl reload crowdsecneu.
Denkt Ihr euch jetzt „Aha?“? Das müsst ihr nicht.
Die „Bouncer“ und „Collections“ usw. sind alle „offiziell“ von
Sollte das nicht funktionieren, könnt Ihr die Pakete auch unter dem Wizard
sudo /usr/share/crowdsec/wizard.sh -caktivieren, indem Ihr einfach ein Häckchen setzt.
Meldet euch gerne bei Fragen!

With havin so much written content do you ever run into any problems of
plagorism or copyright violation? My site has
a lot of unique content I’ve either authored myself or
outsourced but it appears a lot of it is popping it up all over the web without my authorization. Do you know any ways to help stop
content from being stolen? I’d really appreciate it.
Hello Mr. „ChatGPT“,
we actually write a lot of content and try to make it as high quality as possible. Taking action against copyright infringement is difficult here, especially if it happens frequently.
According to German law, however, your texts are not subject to copyright law, as ChatGPT texts are created by artificial intelligence and are not personal intellectual creations.
This is a very interesting topic, and we attended a lecture and discussion session on it earlier this week.
But joking aside, presumably you are not ChatGPT but a real person?
As I said, it’s difficult to solve the problem when it occurs on a large scale.
On the one hand, you could take action against the sites individually (and send the operator a warning letter), but this takes a lot of time and also involves high costs (for lawyers, legal texts, etc.).
The legal situation also depends on the areas and countries concerned.
A „simple“ option would be to equip your site (e.g. via a WordPress plugin) with simple copy protection. (This means that you can no longer copy the content with „ctrl + c“). (Almost) nobody would bother to type out all the articles, especially if they are of high quality and long.
An example here: https://de.wordpress.org/plugins/wp-content-copy-protector/
But even this is not the optimal solution, as you could simply run an OCR tool over it.
You could then install a kind of „screenshot lock“, as we know it from large banks. But that also means a lot more work.
Hopefully we were able to help you a little.
Important: This is not legal advice, just our personal opinion.
Pingback: CrowdSec installieren - NextGeneration Homelab & Cyber Security • Schächner